What is docker?
Docker is a platform that enables developers to create, deploy, and run applications in containers. It uses containerization technology to package applications and their dependencies into containers. These containers can then be easily moved between different environments, such as development, testing, and production, without any changes to the application code.
What problem does docker solve?
In traditional application deployment, physical servers were essential. For instance, we would typically use separate servers for different functions: one for the database (DB) and another for the application (App). Each of these servers operated with its own operating system (OS), alongside other configurations like networking.
However, this approach evolved with the advent of virtualization. This technology enabled us to use a single physical server to host multiple virtual servers. For example, we could have a virtual DB server and a virtual App server running concurrently. Each virtual server required its own virtual OS.
The introduction of Docker marked a further evolution in this field. Docker offers a cost-efficient way to not only virtualize servers but also to enable different servers to share a single OS. This is achieved while maintaining isolation between the servers, enhancing efficiency and resource utilization.
Docker Image vs Docker Container
A Docker image is essentially a blueprint, composed of a series of instructions, for creating a specific environment. For example, starting with a base image like Ubuntu, we can add various instructions. These might include downloading Python and setting up commands to run an app server.
When this Docker image is deployed, it transforms into a container. This means that an image serves as the set of instructions or the template for creating an environment tailored for our application. In contrast, a container is the actual, operational instance of this image, where the defined environment is live and running.
Process ID #1 in Docker Containers:
In Linux operating systems, the first process that the kernel starts is assigned Process ID (PID) 1. This is a key aspect in Docker containers as well: the PID 1 is designated to the primary application running within the container. For example, in a container set up for a database (DB), the database process itself would be PID 1.
Understanding the significance of PID 1 in Docker containers is crucial. This PID 1 process acts as the cornerstone of the container’s operation. If this process encounters any issues, such as a crash or a restart, it directly impacts the container’s stability. In such cases, the entire container ceases to operate, underscoring the critical role of the PID 1 process in the overall health and functionality of a Docker container.
Docker Hub:
Docker Hub is an online repository service where users can store, share, and manage their Docker images. Users can upload their own images, download others’ images, and use them to quickly deploy and run applications in Docker containers.
Run your first docker container:
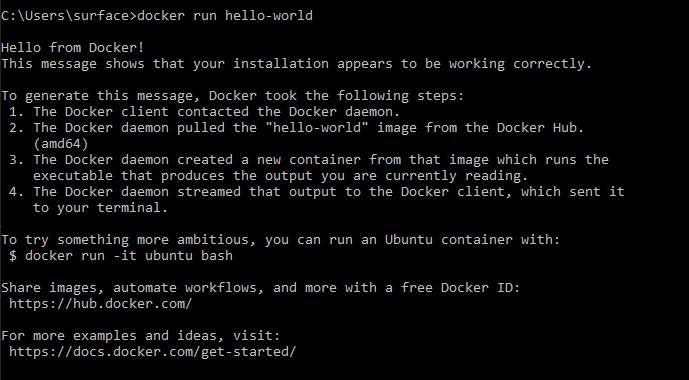
You need to install docker first on your machine, or if you have already installed that you need to start the Docker Engine. In this step we are going to run a docker container, You can use google and search for docker hello-world image or directly going to the docker hub website and search for hello-world. Whenever you need a base image, docker hub is really a good choice to go. If you have found the image you wanted in docker hub, copy the image name, in our case it will be “hello-world”, then in your local machine, inside your terminal type the following command:
docker run hello-world
If this is your first time using hello-world image, as it can not find the image locally, it will start to pull the image from docker hub and then runs it. Then you see a text saying: Hello from Docker!

Tip: When you don’t specify the docker registry address in your command by default it will be docker hub registory. Later we will learn how to use other registry to pull/push images from.
Docker Image Basics:
If you want to create a docker image you have to use Dockerfile, always with an uppercase D and without any file extensions. A Dockerfile is a text document that contains a set of instructions used to create a Docker image. These instructions tell Docker how to build the image by specifying what environment to use, what files to include, and what commands to run. Once a Docker image is created, it can be run as a container on any machine that has Docker installed, ensuring consistency in environments across different systems. An Example of a Dockerfile:
FROM ubuntu:18.04
CMD echo "Hello World!"
Here are some of the most important syntax and commands used in a Dockerfile:
FROM: Specifies the base image to use as the starting point for building a new image. For example,
FROM ubuntu:18.04
starts the build process from the Ubuntu 18.04 image.
Tip: The “latest” tag in the FROM section is used to refer to the most recent version of an image in a repository. When you use a tag like latest, Docker pulls the most up-to-date version of that image at the time of building your Docker image. For example:
FROM ubuntu:latest
Also if you don’t provide any version (just the image name) it will be considered as latest by default. Anyway using latest version is not recommended in production environments, as it might come with some changes that might affect your code or configuration and break it.
CMD: Provides a default command to run when a container starts from the image. There can only be one CMD instruction in a Dockerfile. If you specify more than one CMD, only the last CMD will take effect.
CMD echo "Hello World!"
Build an image:
docker build is a command used to create Docker images from a Dockerfile. To simply run the command for building a simple docker image that has ubuntu as its base image and prints a “Hello World!” as an output, you go to the path that your Dockerfile is and run the following command:
docker build . -t myfirstimage:1
The dot . in the command tells to look for the Dockerfile in the current path.
The t is for giving a tag to the image.

Now that we have build our image, lets run it:
docker run myfirstimage:1

Another option that you can pass for running your containr is -d, it is the detached mode. Basically it will run the container in the background and will give you back your terminal.
docker run -d myfirstimage:1
Well done! You learned how to create your own image and run it.
Here are some of the other important syntax and commands used in a Dockerfile:
WORKDIR: Sets the working directory for any RUN, CMD, ENTRYPOINT, COPY, and ADD instructions that follow in the Dockerfile.
WORKDIR /usr/src/app
COPY: Copies files and directories from the build context (the folder containing the Dockerfile) into the image.
COPY . .
Exmaple of Dockerfile, for building an image using COPY:
Dockerfile:
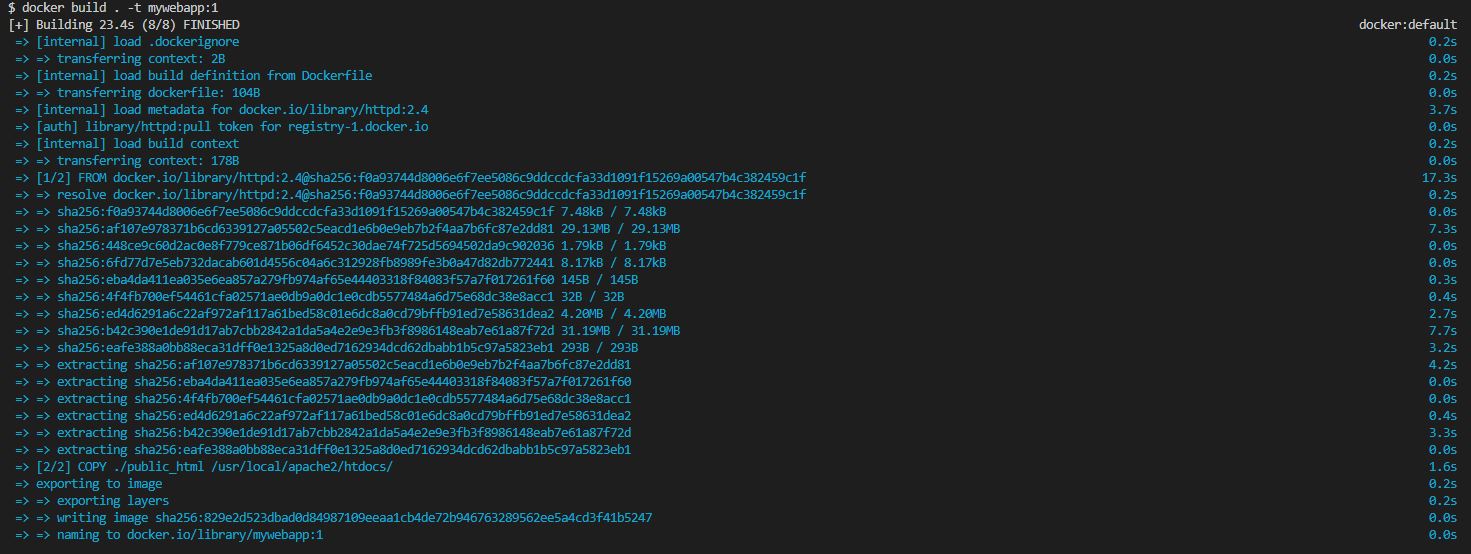
FROM httpd:2.4
COPY ./public_html /usr/local/apache2/htdocs/
public_html/index.html:
<html>
    <head></head>
    <body>
        <p>Hello From Docker!</p>
    </body>
</html>
To build it you can run the following command and expose the port of 8080 for your host and 80 for the httpd.
docker run mywebapp:1 -p 8080:80


ADD: Similar to COPY, but can also handle remote URLs and unpack compressed files.
ADD test.txt relativeDir/
For remote URLs, ADD is not recommended by Docker to be used, because it doesn’t support any sort of connection drop out or error handling. They suggest using CURL instead of ADD.
But another usecase of using ADD is for tar files. For example when we have a backup or website that has been compressed into tarball, we don’t have to run any additional commands to extract it. ADD will handle all of that.
Here is a demo of using ADD in a Dockerfile for this usecase:
Dockerfile:
FROM httpd:2.4
ADD website.tar.gz /usr/local/apache2/htdocs/
Directorty of website/index.html
<html>
    <head></head>
    <body>
        <p>Hello From Tar File!</p>
    </body>
</html>
Creating a tar file:
tar -czvf webite.tar.gz -C webiste .
Building an image from the Dockerfile:
docker build . -t mywebapp:2
Running the container:
docker run -p 8080:80 mywebapp:2

RUN: Executes commands in a new layer on top of the current image and commits the results. So if you have dependencies, tools, libraries, this is where you would use RUN that you want to install as part of your base image, For instance,
RUN apt-get update && apt-get install -y git
installs Git in the image.
ENTRYPOINT: Allows you to configure a container that will run as an executable. It’s similar to CMD but is meant to run the container as a specific command.
FROM ubuntu:latest
ENTRYPOINT ["echo", "Something!"]
RUN vs CMD vs ENTRYPOINT:
RUN executes when we built the image, CMD and ENTRYPOINT executes when we run the container.
But what is the main difference between the CMD and ENTRYPOINT? The big difference between the two is that the ENTRYPOINT determines the main process to run. So whatever we want the process ID number 1 (PID 1) to be, that’s when we use ENTRYPOINT. And CMD is like additional parameters we want to pass into ENTRYPOINT, and we can override the CMD too.
Let’s make it more clear with an example, we have a Dockerfile which has all the 3 commands:
FROM ubuntu:latest
RUN apt-get update && apt-get install -y git
CMD ["World!"]
ENTRYPOINT [ "echo", "Hello"]
docker build . -t myimage:1
So while we are building the image and it gest to line RUN apt-get update && apt-get install -y git, it will update the apt-get and installs git in the image. Then we run the container, The container should execute the command from ENTRYPOINT [ "echo", "Hello"] which is an echo of Hello, but we also have CMD ["World!"], and as we said CMD could be passed as parameters into the ENTRYPOINT, which World form CMD will be added to all the parameters inside the ENTRYPOINT and the result will be Hello World!.
docker run myimage:1

But as we said CMD can be overridden! How we do that? by passing new parameters while running the container we can override that:
docker run myimage:1 Alex!

In our example we passed “Alex!” to be replaced by “World!”, in real world projects we can pass paramaters like ‘prod’, ‘staging’ and ‘dev’.
EXPOSE: Informs Docker that the container listens on the specified network ports at runtime. For example, EXPOSE 80 indicates that the container will listen on port 80.
FROM httpd:2.4
EXPOSE 80
TIP: We learned that another way to expose the host and container to the ports that we want is using -p hostport:containerport like below:
docker run -p 8080:80 myimage:1
When we use EXPOSE 80 in our Dockerfile and the if we run the container with just -P (Capital P), it will look into the container to detemine the port for it and then will randomly pick a port for the host. Although random port is not recommended, but anyway, it is one way of running your container fast!
Run the container in detached mode with -d, and then use docker container ls to see the port for the host.


Use the share button below if you liked it.
It makes me smile, when I see it.